Here's how to start your complimentary 60-day trial for Auto-Align 2 in Pro Tools:
1. Make sure you're using the latest Pro Tools version. The first version that supported AA2 ARA was Pro Tools 2024.6. Earlier versions will only support AA2 as an Insert plugin.
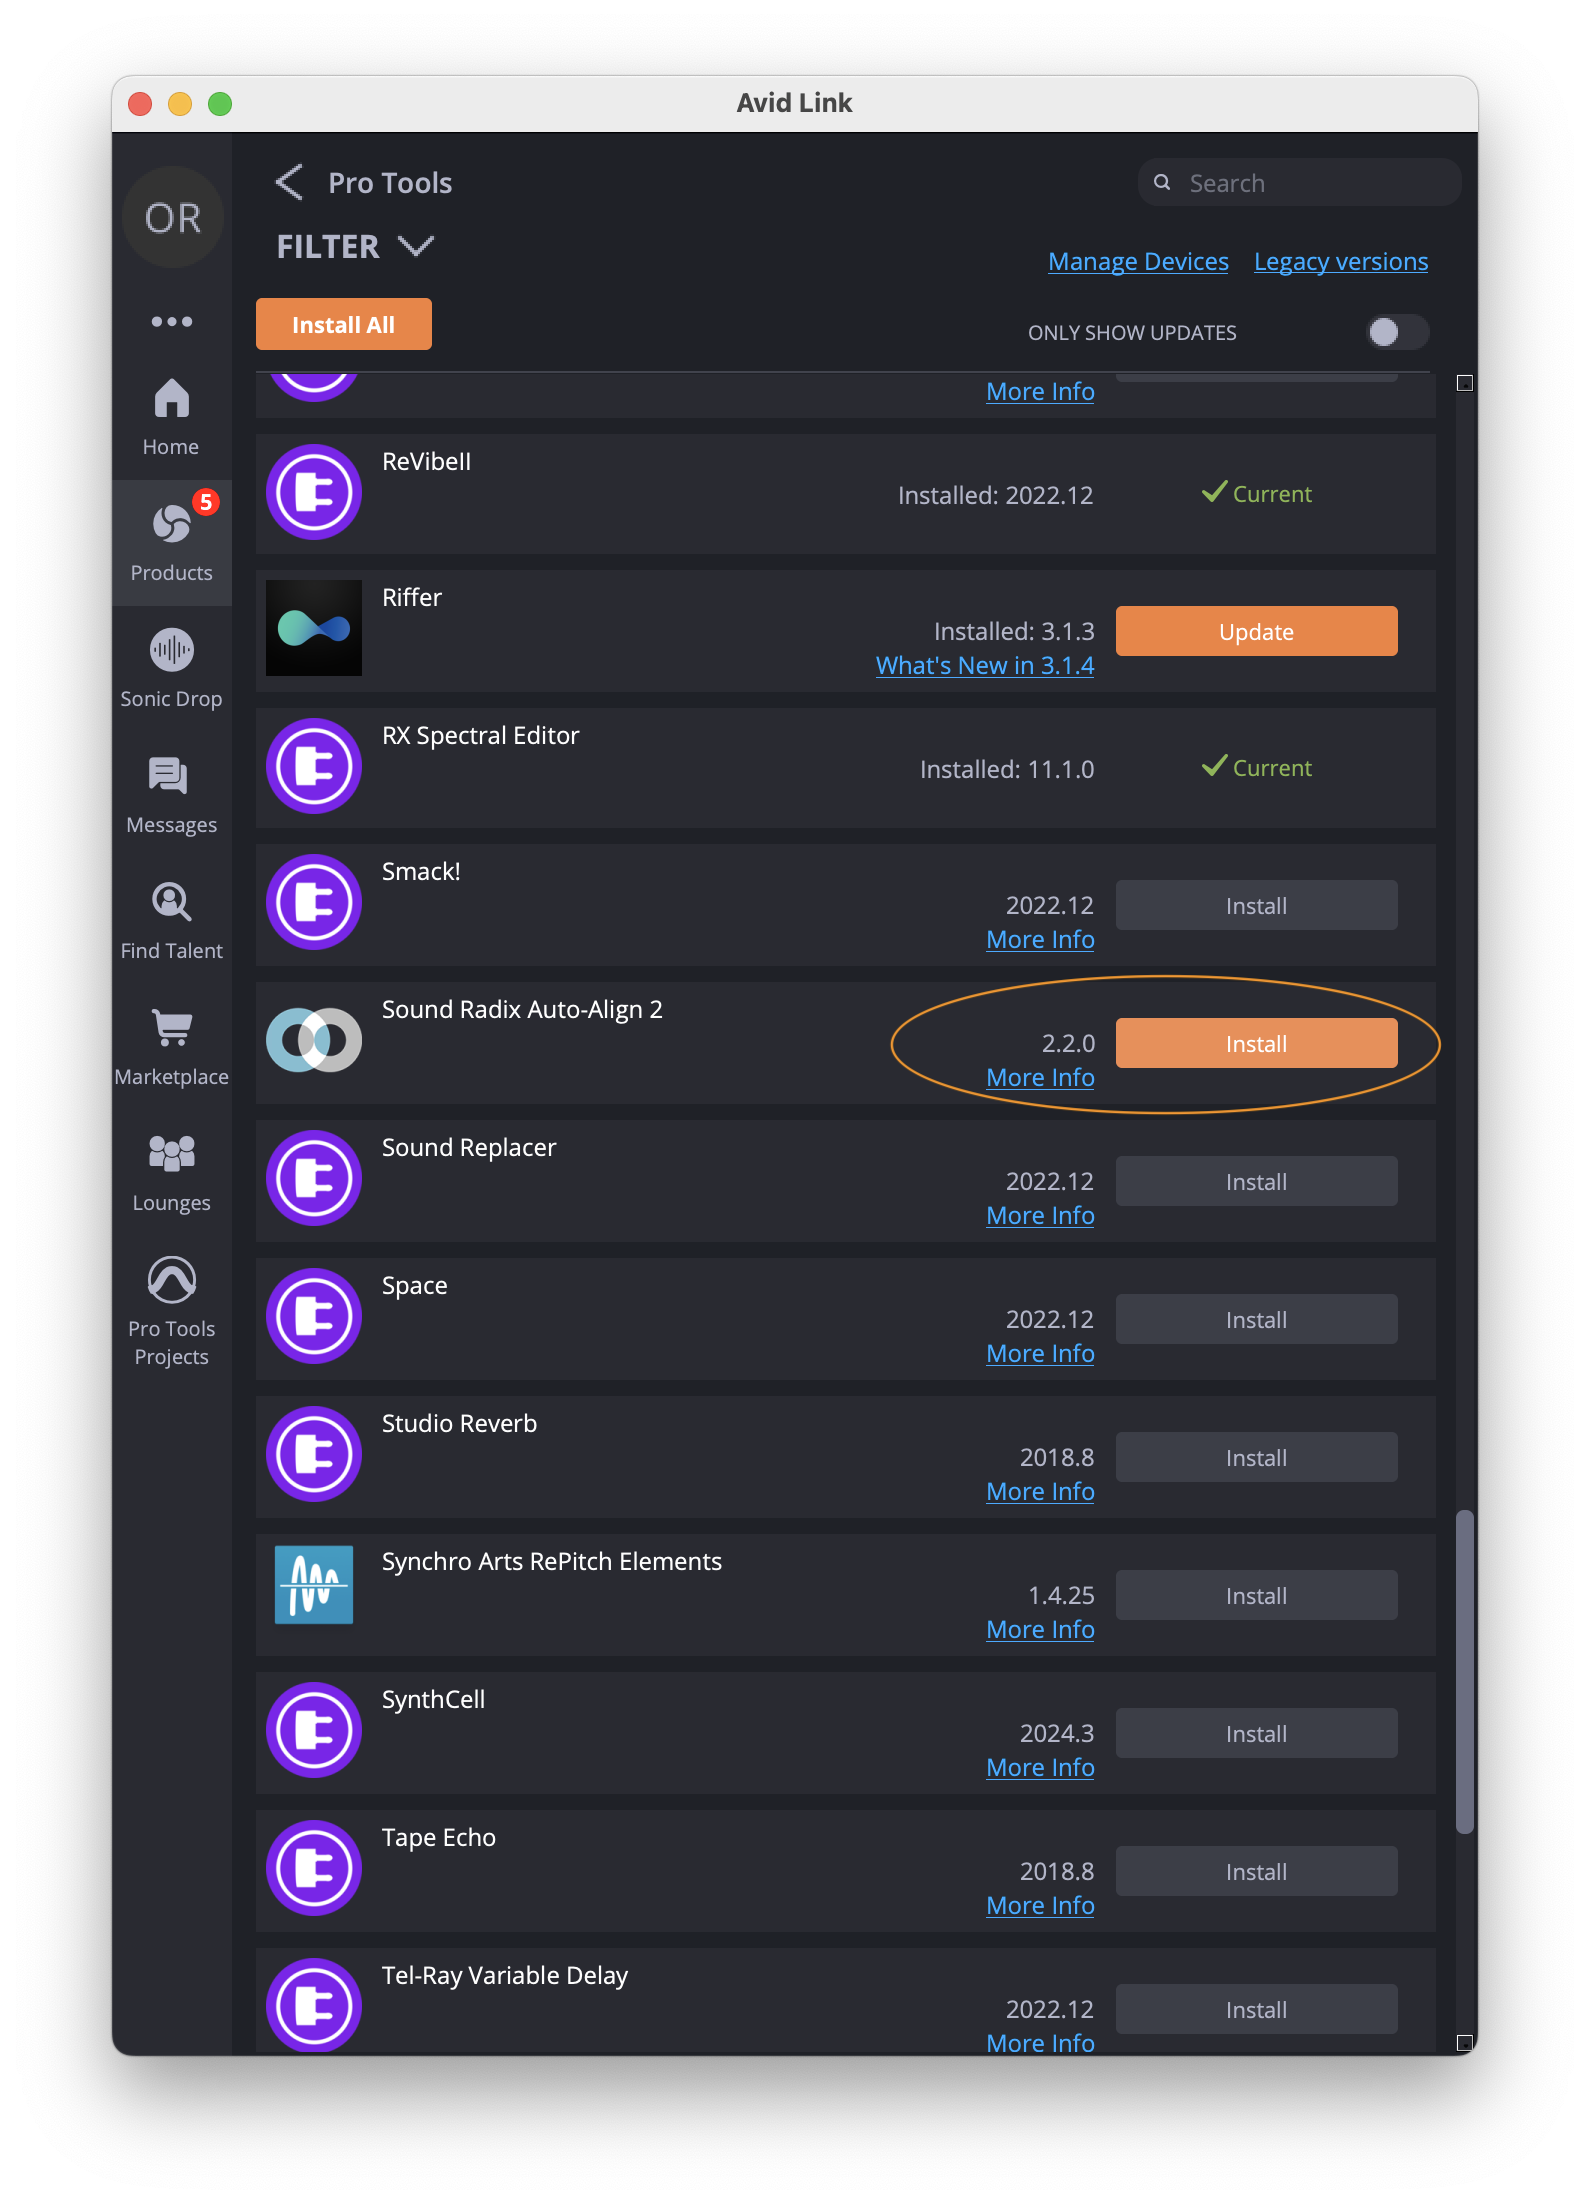
2. After the installation is complete, open the Avid Link application.
3. Go to the ‘Products’ tab and under ‘Pro Tools’ click on ‘Included Apps & Plugins’
4. Locate Auto-Align 2 (you can use the search box).
5. Click install, Auto-Align 2's installer will launch. Follow the installer's instructions to complete the installation.
6. Open Pro Tools, when prompted by the iLok Activation Screen, click ‘Try’ and follow the instructions on the screen. That's it.
Once you're in, here's how to use AA2 ARA:
1. Select all the tracks you'd like to align by clicking on the track's name in the Edit Window.
You can click on the first track, hold 'Shift', and click on the last one - all the tracks between will also be selected.
Hold 'Command' (mac) / 'Ctrl' (Windows) and click to add single tracks.
2. Hold 'Option' (mac) / 'Alt' (Windows) + 'Shift', click on the Elastic Audio Properties menu of any of the selected tracks, and select Auto-Align 2.
3. Click 'Align'.
4. You can use the master on/off switch to hear the before/after of all the aligned tracks.

1. Make sure you're using the latest Pro Tools version. The first version that supported AA2 ARA was Pro Tools 2024.6. Earlier versions will only support AA2 as an Insert plugin.
2. After the installation is complete, open the Avid Link application.
3. Go to the ‘Products’ tab and under ‘Pro Tools’ click on ‘Included Apps & Plugins’
4. Locate Auto-Align 2 (you can use the search box).
5. Click install, Auto-Align 2's installer will launch. Follow the installer's instructions to complete the installation.
6. Open Pro Tools, when prompted by the iLok Activation Screen, click ‘Try’ and follow the instructions on the screen. That's it.
Once you're in, here's how to use AA2 ARA:
1. Select all the tracks you'd like to align by clicking on the track's name in the Edit Window.
You can click on the first track, hold 'Shift', and click on the last one - all the tracks between will also be selected.
Hold 'Command' (mac) / 'Ctrl' (Windows) and click to add single tracks.
2. Hold 'Option' (mac) / 'Alt' (Windows) + 'Shift', click on the Elastic Audio Properties menu of any of the selected tracks, and select Auto-Align 2.
3. Click 'Align'.
4. You can use the master on/off switch to hear the before/after of all the aligned tracks.

Auto-Align Auto-Align Auto-Align Auto-Align Auto-Align Auto-Align Auto-Align Auto-Align
Auto Align Auto Align Auto Align Auto Align Auto Align Auto Align Auto Align Auto Align
Was this article helpful?
That’s Great!
Thank you for your feedback
Sorry! We couldn't be helpful
Thank you for your feedback
Feedback sent
We appreciate your effort and will try to fix the article